Friday, August 04, 2006

20. Boot Camp or Parallels Guide to Running Windows on an Apple MacIntel

by Darryl Ponting, England
From Notebook Review

20. Boot Camp or Parallels Guide to Running Windows on Apple MacIntel

Introduction

Turn the clock back to January 22nd 2006 and to a competition started by enthusiasts to have Windows XP and OS X coexisting on a Mac. Donations were taken and steadily the prize fund grew to a whopping $13,854. 2 months went by with no success then in March 2006 it was announced the competition was over. No sooner had the prize money been handed over had Apple announced their own solution to Windows XP on a Mac, a far more elegant solution and one that consumers could feel a lot more comfortable with.

With Intel's new Core Duo processors they introduced something called Virtualization (in particular native virtualization), this allows an operating system to run inside another with little if any loss in CPU speed. Mac users had up until now relied on Virtual PC by Microsoft to run Windows on OS X, unfortunately due to the difference in the x86 chips commonly used in PCs from Dell, Sony etc and the old PowerPC chips used by Apple up until this year meant that there was a massive performance hit. With the switch to Intel Apple have removed this stumbling block and have opened many opportunities for it's OS X operating system.

Currently there are 2 solutions for Mac owners with an Intel chip for running Windows XP on their machine. First up is the solution from Apple called Boot Camp and secondly is the Virtual Machine (with Virtualization) from Parallels. So what's the difference? With Boot Camp Windows will be running "natively", this means it will be running on the machine as if it was running on any regular PC from any manufacturer. This means full access to the CPU, Graphics and all other aspects. With Parallels Windows XP will be running on a "Virtual Machine", this means that OS X will be running like normal with Windows XP running inside a separate application, in effect two operating systems running at once.

Apple present a quite glowing report on Parallels eve though it's a relative newcomer to the Mac scene, here's a snippet from what they had to say about it on their software page:

"The most powerful, easiest-to-use, cost-effective desktop virtual PC solution available today. It empowers any user, from experienced professional developers to sales executives to casual home users, with the ability to create completely networked, totally secure independent, maximally stable virtual machines on a single physical machine."

Both Boot Camp and Parallels Desktop are in pre-release stage as of writing with Boot camp being beta and Parallels being at RC2 (release candidate 2) stage. As such both pieces of software are free to use right now but when they're both final they'll have their respective costs. Parallels is currently $39.99 to pre order and $79.99 on release if you don't pre order. Boot Camp will be included in Apples next release of OS X, OS X 10.5 Leopard which will be (I imagine) $129.99 and will be one of the "hundreds" of features I'm sure Steve Jobs will try and sell us.

Each different method has its pros and cons and depending on what your need for Windows is one solution will be better than the other for you. In this article I will attempt to outline every pitfall and advantage one solution has over the other and along the way inform you enough to help you make your decision. This area of Macs may be the one remaining question you have before jumping ship and switching!

Setup

Each method has a few additional steps than you may be used to with a regular Windows XP installation, these involve the preparation but after these steps are done it's exactly the same as every Windows XP install you've been lucky enough to have done.

One word of warning, each installation will require activation but both setups are recognized as separate PCs so only one will activate. If you intend on trying both Boot Camp and Parallels then I advise delaying activation until you have made your decision on which to use.

Boot Camp:

Home page | Download Guide (389KB)

Apple has a thorough installation guide for setting up Boot Camp so I'll run through the procedure briefly.

  • Updating your firmware. This may or may not be necessary depending on the age of your Intel based Mac, to find out if you require the update simply run Software Update and if you require it then it will appear in the list. Alternatively you can go to Apples download site and search for your particular firmware upgrade (e.g. Mac Mini firmware update")
  • Run the Boot Camp assistant. After installing Boot Camp you will find an application in your Utilities folder that does 2 things. Firstly it will create a CD for you which will contain all the necessary drivers for Windows XP and secondly it will partition your hard drive


(view large image)

Note, to setup Boot Camp you need to have a single Mac OS X partition formatted as Extended (Journaled) volume. If you have multiple partitions then you must restore the hard drive to a single partition before starting.

After the hard drive has been partitioned and the CD burnt you are prompted to restart your PC at which point Windows XP will install like normal.

When the installation is finished you must install all of the drivers contained on the "Macintosh Drivers CD" which was created by Boot Camp, this contains the drivers for Bluetooth, Wireless, Video and the chipset. It also includes a few small utilities to help day to day life in Windows XP such as a small application that runs on startup which will allow you to use your eject key on the keyboard and another which will allow you to adjust the brightness.

Parallels:

Parallels Desktop follows a similar pattern to previous Virtual Machine software if you've ever tried them before. Upon starting the configuration wizard you are presented 3 options. The first will create a blank virtual machine with the default settings that will allow you to get started straight away, for those who want a little bit more control there's the "custom VM configuration" option that allows you to select the OS, Memory allocation and create a new virtual hard disk. Choosing the custom VM option is the best option in my eyes as memory allocation and hard disk size/type are the 2 biggest defining factors in performance when it comes to virtual machines.

Initial Setup:


(view large image)


(view large image)

Choosing your Operating system:


(view large image)

(view large image)


Memory allocation and Hard Drive selection:

When choosing a hard drive you have two options, an expanding hard drive of a plain hard drive. As the description states, running an expanding hard drive will save on disk space but Parallels will have to keep monitoring free disk space and increasing the size of the virtual hard drive when needed. This could reduce performance but the difference is negligible.

Network Selection:


There are three types of network to choose from, the first will allow full access to both the Internet directly and OS X, the second will create an isolated connection between OS X and the guest operating system with the third turning off network access altogether. I chose the first option and I suspect it's the option 99% of Parallels users will use.

You then choose which real life network adaptor you want Parallels to be tied to. For example if you use wireless all the time you would want to bind it to that to enable Internet access.

Network binding option:

Finally you give it a name (e.g. Windows XP) and the virtual machine is created.


(view large image)

Pros and Cons

As expected each method has its good parts and bad parts, below is everything I've picked up so far.


Everyone will have their reason for wanting or needing to run Windows on their Mac. For some it may be the excuse they need to switch to OS X without losing their beloved PC gaming, for others it could be the ability to run an application they can't leave behind. Whatever your reason will greatly impact your choice between Boot Camp and Parallels.

My reason for running Windows was because I need to run Visio 2003 on a day-to-day basis and this meant I needed (well, wanted) a snappy GUI. For others it may be a simple application or running ActiveX applets in Internet Explorer. Which one was the best option for me? Read on and find out.

Ease of setup:

As you can see there is a lot more preparation work involved in Parallels Desktop compared to Boot Camp, in reality it's a lot less time than this article suggests with both options running at around 5-10 minutes preparation time. This is something to consider when choosing between the 2 so if you're not too confident on performing either of these then I'd recommend Boot Camp as it has the typical Apple ease of use and holds your hand through the few steps it has, it's likely to be even easier when included as part of OS X. Both have support forums from their respective developers, Apple has one on their discussion forums and Parallels have one on their forums.

Installing Windows XP takes roughly the same time on both machines, this is to be expected as at this point it's relying on the CPU quite a lot so Boot camp can't really offer one of it's major advantages over Parallels just yet.

Hands On

Boot Camp:

With Boot Camp there's not really much to say in comparison to Parallels. It runs very fast, about as fast you would expect Windows to run on a similarly specified Windows laptop from someone like Acer, Asus, Dell, Sony or IBM. One aspect that Boot Camp has to its disadvantage is the difficulty in which you can share files with OS X, you have a few options but I'm not too keen on any of them. The first option is setting Windows XP up on a FAT32 partition, this will allow OS X to read and write to the Windows XP partition but not vice versa.

Macdrive is a utility from MediaFour that allows Windows to read and write to a HFS+ partition, perfect in this situation as it allows maximum compatibility between operating systems as demonstrated in the table above.

One of the biggest reasons for choosing Boot Camp over Parallels is full access to the graphics hardware allowing far better responsiveness in the GUI as well as the ability to play games. Of course it helps if your Mac has a decent graphics card such as the X1600 in the Macbook Pro but that's a different discussion. Personally I own a Macbook and as such it's limited by the GMA950 included but with other Macs the difference will be far greater. For example you could play Half Life 2 on your Macbook Pro under Boot Camp at 40-60 FPS but you couldn't play the game under Parallels as it will still emulate a 8MB graphics card.


(view large image)

Parallels:

Because of the nature of Parallels it can perform a lot worse than Boot Camp depending on the capabilities of your Mac. If you only have 512MB of RAM then this is shared between 2 operating systems and as such performance can drag a little, if you have the luxury or 1-2GB RAM then you can allocate 512MB -- 1GB of RAM to Parallels with plenty left for OS X. This is an area that Boot Camp doesn't have to worry about because it has full access to all of your memory, something to consider if you are limited on RAM.

With CPU intensive tasks there is barely any difference in actual speed between Boot Camp and Parallels but there is a bigger perceived difference because of the way the GUI responds. One of the tests I performed in my Macbook review was a Photoshop test that is CPU intensive; the results show that it's almost on par with Boot Camp with not really any discernable difference.


(view large image)

One area that this benchmark doesn't show is the responsiveness of the GUI in Parallels, although the benchmark was performed in suitable time the "feel" of Photoshop wasn't as nice as using it in Boot Camp.

Parallels GUI video

Parallels GUI video

Parallels auto resolution adjusting video

Parallels trackpad scrolling video

If you're only after a small application every now and again the inconvenience of rebooting into Windows is probably too much, this is one of the biggest advantages that Parallels can offer over Boot Camp. Parallels can resume to a usable Windows desktop in less than 9 seconds but a reboot into Boot Camp can take over 60 seconds with the added disadvantage of having to close whatever you're doing in OS X.


(view large image)

The above example is based on booting Windows XP fresh with Boot Camp (not restarting from OS X) and the Parallels time is based on resuming the virtual machine. There is no need to ever shut down the virtual machine as every time you quit Parallels you have the option to suspend instead of turning off the virtual machine.

Boot Camp boot video

Parallels resume speed video

After setting up Windows in Parallels one of the first things you should do is install the "VM Tools", this adds lots of functionality as well as increasing the performance.


(view large image)


One of the most useful tools that's included is the Shared Folders Tool, this allows full access to any specified folder on your OS X partition without the need for extra (paid for) software. Setup is simple but must be performed when the virtual machine is turned off (or suspended), the tool has the ability to share individual folders and set them as Read Only if required.


(view large image)


(view large image)

The folders specified appear in the Parallels Shared Folder on the desktop with a slight lag of around 3-4 seconds the first time you open it, each time from then on it will be as instant as any other folder within the virtual machine.

Opening a Shared Folder video

Gaming Performance:

One area that Mac owners feel pretty envious about is PC gaming, every now and again a classic will roll around and although their machine is powerful enough to play it it's a Windows only experience. One of these is Half Life 2 and I know just by gauging peoples questions dotted around the forums that this is one of the games they want to know performance figures for, in particular on the Macbook. Well here they are:


(view large image)

This is on a 2.0GHz Macbook with 2GB RAM and 5400RPM 100GB Hard Drive. This simple isn't possible on Parallels and you could argue that it wasn't intended to be used in this way. As time goes on then hopefully we'll get some sort of direct access to the graphics on these Virtual machine applications then we'll be able to play games.

Half Life 2 at 1024*768 video

Half Life 2 at 1280*800 video

Virtue Desktops and multiple displays

One of the more impressive videos you may have seen around the net is the one of OS X doing a neat cube transition into Windows XP; this is made possible by a virtual desktop program and Parallels. The virtual desktop program in question is VirtueDesktops, this will allow Parallels to be running on it's own desktop in full screen whilst you use your normal programs in OS X on another.

Once you've installed VirtueDesktops you can configure the 2 desktops by clicking the menu bar item and selecting Inspection -- Desktops...


(view large image)

After doing this you simply navigate to your Windows XP desktop and launch Parallels then enter full screen, you now have 2 virtual desktops with one as OS X and the other as XP. I've personally come across a few glitches whilst running these two programs together but it's worth noting that they're not final. One of the biggest gripes I have is that the hotkey for switching between desktops works fine until Parallels has captured your keyboard and mouse, then it ceases to work.

Parallels and Virtue Desktops video

A far more elegant setup is with 2 monitors; you can have Parallels running full screen on the second monitor whilst continuing to work on OS X on the primary monitor.

Parallels Dual Monitor setup video

One of the problems I encountered was that Parallels couldn't pick up the resolution I wanted of 1360*768 on my TV although I imagine this could be sorted with something like Powerstrip.

Conclusion

Mac users have never been so lucky in terms of choice when it comes to Windows compatibility and the outlook is even brighter. Boot Camp will have all its kinks ironed out and will be included in OS X 10.5 Leopard, whether it's in the same form I don't know and Parallels is currently approaching its final release. The choice to be made really boils down to one thing; it's a trade off between convenience and speed. Boot Camp is faster than Parallels by far, especially when it comes to GUI responsiveness and gaming but depending on what you need Windows for speed might be worth giving up for the ability to run Windows and OS X at the same time. If you're a web developer for example and want to check out how your site renders in IE6 then Parallels will be ideal, develop on OS X then quickly flick over to IE6 in a virtual machine to check it out, all in less then 30 seconds. If you're after something with a bit more or intend on using Windows for any decent amount of time then I'd suggest Boot Camp, for what I need Windows for it's a much more satisfying experience using Windows XP natively then it is under a virtual machine. As demonstrated above gaming is only really possible on Boot Camp because of the emulated graphics on Parallels so if you're hankering after a bit of PC gaming on your Mac you only really have one choice. The other thing to consider is cost, at the moment Parallels is a $39.99 pre order with the program being $79.99 on release. Boot Camp on the other hand is a free beta right now and will be a technology bundled into OS X 105 Leopard, of course you'll have to pay for the OS when it finally gets released but I imagine most Mac users will be buying it anyway.

There's a lot to consider when making your choice so hopefully this article has helped, maybe it's given you the confidence to try out both for yourself and see which one suits you better, either way don't go having too much fun on Windows because OS X will be sat here waiting.

Related Downloads

Monday, July 10, 2006

19. LCD Resolutions and Ratios (Part 1)

From WideScreen Gaming Forum
Thanks to pubjoe, Ibrin, Paradigm Shifter,FortranDragon, edplayer, Stretch, Dougofthenorth, and Sunfox (Screen & text size comparrisons) for providing the information.
Written by Dougofthenorth.


LCD Resolutions and Ratios

Part I - RESOLUTIONS

Part II - SCREEN SIZE COMPARISONS

Part III - DISPLAY CLASS NAMES


Part I - RESOLUTIONS


TIP:
When experimenting with resolutions, while searching for possible performance solutions.
I.E 1280x1024 = 1.310MP & 1440x900 = 1.296MP.
Therefore, if you find acceptable results for a video card &/or PC mo
nitor/HDTV at 1280x1024, then you might very well have comparible results at 1440x900.
So by using the RATIO FORMULA & DECIMAL CONVERSION below any number close to the decimal for the WS ratio you want, should work pretty well.


The list is sorted by the RIGHT side resolution number WWW X HHHH. (W=Width, H=Height)

RESOLUTION_____ASPECT RATIO

640x400_____________16:10
720X480_____________15:10
848X480_____________16:9
852X480_____________16:10
856X480_____________16:10
840X525_____________16:10
960X540_____________16:9
960X600_____________16:10

1280X720____________16:9
1280X768____________15:10
1360X768____________16:9
1366X768____________16:9 (Viewsonic & DiBoss 32" LCDs)
1368X768____________16:9
1280X800____________16:10

1440X900____________16:10
1440X960____________15:10
1800X960____________15:8

1768X992____________16:10 (Sony 32" LCD)
1776X1000___________16:9
1600X1024___________15:10
1680X1050___________16:10
2960X1050___________16:10 (Dual monitors)
1920X1080___________16:9 (HDTV)
1920X1200___________16:10
2560X1600___________16:10 (30" Apple Cinema Display)
3200X2048___________15:10

3840X2400___________16:10 (Viewsonic 22.2" VP2290b LCD)


RATIO FORMULA & DECIMAL CONVERSION

WIDTH / HEIGHT =

1.25 = 5:4

1.33 = 4:3
1.50 = 15:10 WS
1.60 = 16:10 WS
1.66 = 5:3 (or 15:9) WS
1.77 = 16:9 WS


(Click image to enlarge)

Part II - SCREEN SIZE COMPARISONS


TEXT SIZE COMPARISSONS


Part III - DISPLAY CLASS NAMES


INITIALS / NAME / HORIZONTAL X VERTICLE RESOLUTION

CGA Color Graphics Adaptor 320X200
MCGA Multicolor Graphics Adapter 320x200
HGC Hercules Graphics Card 720×348
MDA Monochrome Display Adapter 720×350
EGA Enhanced Graphics Adaptor 640X350
VGA Video Graphics Array 640X480
SVGA Super Video Graphics Array 800X600
8514 8514/A display adapter 1024×768
XGA EXtended Graphics Array 1024X768
SXGA Super EXtended Graphics Array 1280X1024
SXGA+ Super EXtended Graphics Array 1400X1050
UXGA Ultra EXtended Graphics Array 1600X1200
QXGA Quad EXtended Graphics Array 2048X1536
QSXGA Quad Super EXtended Graphics Array 2560X2048
WVGA Wide Video Graphics Array 852X480
WXGA Wide EXtended Graphics Array (1280 to 1366)X(720 to 800)
WXGA+ Wide EXtended Graphics Array 1280X800
WSXGA Wide Super EXtended Graphics Array 1600X1024
WSCGA+ Wide Super EXtended Graphics Array 1680X1050
WUXGA Wide Ultra EXtended Graphics Array 1920X1200
WQSXGA Wide Quad Super EXtended Graphics Array 3200X2048
WQUXGA Wide Quad Ultra EXtended Graphics Array 3840X2400
HDTV High Definition TV 1920X1080
HDTV+ High Definition TV Plus 1920X1200

SDTV / EDTV / HDTV Specifications:

1080i/p HDTV format is 1920 X 1080 pixels.
720i/p [aka HDTV & SDTV (S=Super) or EDTV] is 1280 X ~720 (768).
480p EDTV (E=Enhanced or Extended) [may/may not be widescreen] is 640 X 480 or 704 X 480.
< or =" 420i" s="Standard)" style="font-weight: bold;">old
cable/Beta/VHS/over air = ~240 to 320)


HD vs ED vs SD
Refers to the resolution or number of pixels used to represent a single video image frame. Standard Definition refers to having about 350,000 pixels per frame &
High Definition refers to having about 2,000,000 pixels per frame, (or about 6 times more than SD). Therefore, 7201/p is NOT True HD.

I will add more information once I or Dougofthenorth receive them.

Thursday, June 22, 2006

9. Graphics Card Comparison Chart

Most of this is taken from Notebookreview. Some parts i added
By: ChazMan

The purpose of this chart is to show where a given GPU places in the 3D mobile arena. I have included everything from integrated and the outdated AGP graphics cards to the latest PCI-express ones.

This is a quick and easy way to find out if your computer can run any game:
http://www.systemrequirementslab.com/referrer/srtest.

Integrated and AGP graphics

1. Integrated Graphics Cards
2. AGP Cards
3. PCI-Express Cards


The cards are in order, from top to bottom, in the level of performance.
In order from lowest to highest performance.

Part #1: Integrated Graphics Processors


In order of performance:

Intel Extreme Graphics
SiS Integrated Graphics
Intel Extreme Graphics 2
Intel GMA900
Intel GMA950
ATI Radeon Xpress 200M

Part #2: Accelerated Graphics Port (AGP) Cards:


In order of performance:

Nvidia GeForce 4 440 Go
ATI Radeon 9000

Nvidia FX Go5200
ATI Radeon 9200

Nvidia FX Go5600/5650
ATI Radeon 9600

Nvidia FX Go5700
ATI Mobility Radeon 9700

ATI Radeon 9800 (no competition)

Notes: The Nvidia Go FX series are horribly outdated, and will not perform well in the latest games. ATI's Mobility Radeon 9600/9700/9800 are considerably better in the latest games, but still not ideal. Skip all of the above cards if you can and get a newer one. Avoid the Nvidia FX.

Part #3: PCI Express (PCI-e x16) Cards


In order of performance:

ATI Radeon X300
Nvidia Go6200
Nvidia Go7300
ATI Mobility X1300

Nvidia GeForce Go6400
ATI Radeon X600
Nvidia Go7400
ATI Radeon X1400

Nvidia Go6600
ATI Mobility X700
Nvidia Go7600
ATI Radeon X1600


Nvidia Go6800
ATI Radeon X800
Nvidia Go6800 Ultra
ATI Radeon X800XT
Nvidia Go7800
ATI Radeon X1800

Nvidia Go7900GS
Nvidia Go7800GTX
ATI Radeon X1800XT
Nvidia Go7900GTX


The ultimate chart - including all cards:


In order of performance:

Intel Extreme Graphics

SiS Integrated

Intel Extreme Graphics 2

Intel GMA900

Intel GMA950

Nvidia GeForce 4 440 Go

ATI Mobility Radeon 9000

Nvidia FX Go5200

ATI Radeon Xpress 200M

ATI Mobility Radeon 9200

Nvidia FX Go5600/5650

ATI Radeon 9600

ATI Radeon X300

Nvidia GeForce Go7300

ATI Radeon X1300

ATI Radeon 9700

ATI Radeon X600

Nvidia GeForce Go7400

ATI Radeon X1400

Nvidia Go6600

ATI Radeon 9800

ATI Radeon X700

Nvidia Go6800

ATI Radeon X800

Nvidia Go7600

ATI Radeon X1600

Nvidia Go6800 Ultra

ATI Radeon X800XT

Nvidia Go7800

ATI Radeon X1800

Nvidia Go7900GS

Nvidia Go7800GTX

ATI Radeon X1800XT

Nvidia Go7900GTX

There you go.


All About Pixel Pipelines for Graphics Cards
By Meaker and Neeyik

This is a condensed version:

Ultra High end - 512mb useful
--------
7900GTX SLI = 24 PSUs, 8 vertex units, 16 ROPs, 256 bit mem (500/600) *2 SM3
7800GTX SLI = 24 PSUs, 8 vertex units, 16 ROPs, 256 bit mem (400/550) *2 SM3

High end - 256mb useful
--------
7900GTX = 24 PSUs, 8 vertex units, 16 ROPs, 256 bit mem (500/600) SM3
X1800 XT = 16 PSUs, 8 vertex units, 16 ROPs, 256 bit mem (550/650) SM3
7800GTX = 24 PSUs, 8 vertex units, 16 ROPs, 256 bit mem (400/550) SM3
7900GS = 20 PSUs, 7 vertex units, 12 ROPs, 256 bit mem (375/500) SM3
X1800 = 12 PSUs, 8 vertex units, 12 ROPs, 256 bit mem (450/500) SM3

Mid-High end - 256 mb useful
--------
x800xt = 16 PSUs, 6 vertex units, 16 ROPs, 256 bit mem (480/550)
6800U = 12 PSUs, 5 vertex units, 16 ROPs, 256 bit mem (450/550) SM3
7600GT = 12 PSUs, 5 vertex units, 8 ROPs, 128 bit mem (600/500) SM3
x800pro = 12 PSUs, 6 vertex units, 12 ROPs, 256 bit mem (400/400)
7800 = 16 PSUs, 6 vertex units, 16 ROPs, 256 bit mem (250/329) SM3
6800 = 12 PSUs, 5 vertex units, 12 ROPs, 256 bit mem (300/300) SM3

Mid range - 256mb useful
--------
x1600 = 12 PSUs, 5 vertex units, 4 ROPs, 128 bit mem (470/470) SM3
7600 = 8 PSUs, 5 vertex units, 8 ROPs, 128 bit mem (~450/500) SM3
x700 = 8 PSUs, 6 vertex units, 8 ROPs, 128 bit mem (350/300)
6600 = 8 PSUs, 3 vertex units, 8 ROPs, 128 bit mem (300/300) SM3

Low end - 128mb useful
--------
x1400 = 4 PSUs, 2 vertex units, 4 ROPs, 128 bit mem (432/400) SM3
x1300 = 4 PSUs, 2 vertex units, 4 ROPs, 128 bit mem (hyper mem) (400/325) SM3
7400 = 4 PSUs, 3 vertex units, 4 ROPs, 64 bit mem (450/450) SM3
x600 = 4 PSUs, 2 vertex units, 4 ROPs, 128 bit mem (400/250)
x600se = 4 PSUs, 2 vertex units, 4 ROPs,128bit mem (358/277)
9700 = 4 PSUs, 2 vertex units, 4 ROPs, 128 bit mem (450/213)
9600 = 4 PSUs, 2 vertex units, 4 ROPs, 128 bit mem (333/? (240 turbo))
6400 = 4 PSUs, 2 vertex units, 4 ROPs, 64 bit mem (400/350) SM3
7300 = 4 PSUs, 3 vertex units, 4 ROPs, 64 bit mem (350/350) SM3
x300 = 4 PSUs, 2 vertex units, 4 ROPs, 64 bit mem (300/230)
6200 = 4 PSUs, 2 vertex units, 4 ROPs, 64 bit mem (300/300) SM3

Ultra low end - N/A
--------
7200 = ? PSUs, ? vertex units, ? ROPS, system memory only (?/N/A) SM3
6150 = 2 PSUs, 1 vertex unit, 2 ROPs, system memory only (475/N/A)** SM3
6100 = 2 PSUs, 1 vertex unit, 2 ROPs, system memory only (425/N/A) ** SM3
xpress1150 = 2 PSUs, 2? vertex units, 2 ROPs, 128^ bit & 32* bit mem (400/ (SYS MEM & ?*))
xpress1100 = 2 PSUs, 2? vertex units, 2 ROPs, 128^ bit & 32* bit mem (300/ (SYS MEM & ?*))
xpress200 = 2 PSUs, 2? vertex units, 2 ROPs, 128^ bit & 32* bit mem (300/ (SYS MEM & 350*))
5x00 = 4 PSUs, (Array) vertex units, 4 ROPs, 128 bit/64 bit mem (%/%)
All other integrated solutions (GMA 900, 950 etc.)

*Dependant on memory attached to side port
** Performance of these two is identical
^system mem bus width
% Covers entire series, pretty awful due to high power consumption and generally poor arc, 5700go would rate a little higher but those above it perform much better in DX9 titles such as HL2 therefore they get stuck at the bottom.

* = Dependant on memory attached to side port
^ = System mem bus width
% = Covers entire series, pretty awful due to high power consumption and generally poor arc, 5700 Go would rate a little higher but those above it perform much better in DX9 titles such as HL2 therefore they get stuck at the bottom.


Basic Explanations of video card classes:


Integrated Graphics cards:

Although integrated graphics cards are for basic purposes, it would be useful to include it in this guide to answer any questions vs. dedicated graphics.
Integrated Graphics cards are not what you want to have if you plan on doing 3D-related activities. They are fine for web browsing, watching videos/DVD's, and other basic tasks, but they are not suited for much else.

Out of the cards I have listed, the GMA900 is the most common, often found in lower-end mainstream notebooks. It is currently being replaced by the GMA950, which is not that much faster [still useless for 3D] in newer notebooks. The GMA900/950 is only found in Intel notebooks.
Another common integrated GPU is the ATI Radeon Xpress 200M, avaliable in two versions - one with shared memory (does not have any of its own memory), and one with dedicated, which has its own memory, meaning it doesn't have to borrow memory from your main RAM. The X200M is the best integrated graphics card in terms of performance today, much faster than the Intel GMA900/950. It is mainly found in AMD-based notebooks, although it is starting to make its way into the Intel-based notebooks. For comparison purposes, the dedicated X200M is about 2/3 as fast as a standard Mobility Radeon X300, which it is based on. The X200M is actually capable of some light 3D, but remember that it is integrated, and you will be very limited when it comes to games - do not buy it for that purpose.

Two real advantages of integrated GPU's is that they are very light on power, and they reduce the overall cost of the notebook signifigantly. But, remember - these cards are not 3D work, so steer clear if you plan on doing that. The only exception I can make is the X200M - it is at the bottom of the barrel for performance compared to any of the dedicated cards I have listed in this comparison, but will still beat any other integrated card handily.

Low-End Graphics Cards (highlighted in blue):


These cards are fine for multimedia purposes, plus light 3D, but don't expect to play the latest games at anything but lower settings. That is not what they are designed for anyway. If you are a gamer, these cards are not for you. These cards can be found in any number of notebook sizes, ranging from as low as 13.3" to 17". I'd recommend having one of these cards if you like to do multimedia-oriented tasks more often than not (Photoshop, apps. such as that so that the video card won't take any of your system memory as with an integrated card).

The latter two cards, the X1300/Go7300, are the replacements for the X300/6200.

What games can I play on these?


As I stated, you aren't going to want these cards for gaming. Counter-Strike: Source and Half-Life 2, plus older generation cards such as Unreal Tournament 2004 would be fine, but newer games such as FEAR - barely, if at all, playable. Don't bother.

Mainstream/Mid-range Graphics Cards (highlighted in green):


A clear step up in performance from the low-end cards, these cards are good enough to play the latest games at medium settings and resolutions give or take, but do not expect blazing performance. These cards are fine for the occasional gamer, but if the prime intent of your notebook is to game, you won't get spectacular performance out of these.
Mid-end cards do not produce a large amount of heat, and therefore, can be found in smaller notebooks around 13.3-14". However, they would be more common in a larger 15.4" notebooks.

The X1400/Go7400 are the replacements for the X600/6400.

Performance Standings: The two newest cards in this segment are the Go7400 and the X1400. Of the two, it is advisable to get the Radeon X1400 over the GeForce Go7400. The Go7400 is a limited card, unimpressive. One of the reasons it is a poor performer is because of the memory bus - where as a normal card in this range has a 128-bit bus, the Go7400 only has a 64-bit, which cuts the bandwidth in half and effectively drags down performance.
The Radeon X1400 on the other hand has a full 128-bit bus, and will prove to be the stronger card overall.

What games can I play on these?


Unlike the low-end cards, these actually have a chance at the latest games. You can play HL2/CS:S fine, along with Far Cry and games similar to that. FEAR is where these cards will choke up, but it's going to be playable at lower settings and resolution.

Performance Graphics Cards (highlighted in red):

The Performance cards are designed for 3D gaming on a mobile level; you don't have to get a huge desktop replacement in order to have one of these cards. They do not produce a huge amount of heat, but don't exactly run cool. Battery life is balanced. A notebook equipped with one of these cards will see noticeably lower battery life when compared to one that has integrated graphics.
Performance-class cards are great for gamers wanting fast 3D performance in a mobile form factor. These cards are capable of playing the latest games with no problems, at close to or maximum settings and a balanced resolution. Typically, expect to see performance cards in a 15-15.4" notebook.

The new GeForce Go7600 is replacing the current generation Go6600, and ATI also has the X1600 as a replacement for the current X700.

What games can I play on these?

These cards are what to target if you want to play games at good settings and resolution. They can handle just about everything on high settings (at various resolutions, depends on the game), the Go7600/X1600 more so than the Go6600/X700. FEAR would be decent on a system with one of these cards as long as you have a decent amount of RAM. An X700/Go6600 can run FEAR at high settings at 800x600, the X1600 and Go7600 can do the same but at higher resolutions. It is advisable to get a Go7600/X1600 over the Go6600/X700 because they will be better able to play newer games.

High-End/Desktop Replacement (left as black):


Not found in many notebooks, the high-end cards are at the top of their game, easily playing the latest games at maximum settings. However, all that performance comes at a price. A large amount of heat and considerable power consumption all add up to a notebook with a large cooling solution, which in turn leads to a bigger and heavier notebook. High-end cards are most often found in a 17" form factor. Battery life, as you probably already concluded, is poor indeed.
What games can I play on these?


Everything and anything at maximum settings. However, the Go7800 and X1800 series are a huge improvement in performance over the older Go6800- and X800-class cards. Go for one of those. The newest high-end card is the Nvidia GeForce Go7900 series. The Go7900GS is just under the Go7800GTX, about 12% slower according to 3DMark06 benchmarks. The GeForce Go7900GTX on the other hand is substantially faster than the Go7800GTX, which it replaced. It also runs cooler. You can think of it as basically a tweaked and refined Go7800GTX.

Other information regarding video cards:


Windows Vista


Many of you out there are interested in upgrading to Microsoft's next-generation operating system when it is released later this year. You are probably aware by now that it will have a 3D-based interface, which relies on your graphics card. It is recommended that you have a 64MB DirectX 9 GPU in order to run the "Aero Glass" 3D interface. The Radeon Xpress 200M is your best bet for an integrated card if you plan to run Windows Vista; Intel's GMA950 will also run it, see here. The GMA900 cannot run the Aero Glass interface. Any of the above dedicated cards [Parts 2-5] can run the Aero Glass interface. But remember, even if you don't meet the requirements for the Aero Glass, Windows Vista will still be able to run fine, just with the 3D settings scaled lower or off.

Video Memory

A very common question when referring to gaming concerns the amount of video memory you need. Today's games have been requiring 64MB video cards for quite a while.
Basic explanation: Video memory is important because the video card needs a place to store all the information about the 3D environment in a game - if it doesn't have enough room to store it all, the card will not be able to render a scene as quickly becaues the card will have to keep swapping in and out information to the memory. This becomes especially limiting at higher resolutions.

The minimum that I would recommend for gaming today is AT LEAST 128MB card. Gamers should be comfortable with 128MB cards with most games. However, if you are a hardcore gamer and plan on doing a lot of intensive gaming, especially with higher-end and more modern games, it is best to have a 256MB card. This will also help 'future-proof' your notebook for next-generation games, since they will be more complex and advanced, and thus need to store more information. Cards equipped with 256MB of video memory are better able to play at higher resolutions and settings. Gaming at higher resolutions uses more video memory because the 3D environment is much larger, and therefore requires a larger memory space. Do not buy acomputer with a 64MB graphics card if you plan to play games.


There is one more factor that goes along with video memory - the GPU itself. Some GPU's, although they have a lot of memory [example: 256MB X600] cannot use it all because they are not fast enough to do so.


Cards in the performance class and above can use more than 128MB of memory effectively, but not 256MB. Very few cards can. If you can get a 256MB version of those cards (X700/Go6600 and up), then go for it by all means. It helps for reasons I stated above about video memory. They will be great for gaming.

What I mean by using the memory 'effectively' is that the card will perform better if it has more memory - some cards will have performance benefits if you have 256MB of memory versus 128MB, some won't.

However, cards in the Mainstream range aren't even fast enough to use 128MB of memory effectively, so if you are getting one of those cards, it doesn't matter if they are 128MB or 256MB.

To clear up confusion, a midrange card will not outperform a higher-end card with more video memory (ex: 128MB X700 is faster than 256MB X1400/Go7400).

Another point - a high-end CPU won't make up for a weak card. If you have integrated graphics, it doesn't matter if you have a top-of-the-line AMD Athlon processor paired to it, that won't help your 3D performance enough to make a difference. For games, 95% of the power for the games comes from the graphics card.

So basically, if you're looking for a gaming computer, the GPU (graphics card) should be your top priority.

Conclusion:
Overall, I hoped this guide has helped clear up some common and more advanced questions regarding 3D graphics in a notebook. Please make sure any questions you ask here in the Gaming/Graphics forum aren't already answered in this guide.

Useful Links:
ATI Mobile Cards
Nvidia Mobile Cards

Thanks for your time and reading all the way to the bottom!

Monday, June 12, 2006

18. Do-It-Yourself: Making An External Hard Drive Guide

From NotebookReview
By: gilo

If you're looking for some extra external storage for your notebook you could go out and buy a ready made USB or FireWire external 100GB hard drive for around $200, or you could more cheaply and quite easily make your own portable external hard drive by buying an enclosure and "naked" hard drive and slapping them together for around $100. Furthermore, instead of chucking away that old 40GB notebook hard drive you just upgraded you can read this guide and see how to easily use it as an external hard drive for data backup.

My 2.5 Cents Inch External Hard Drive DIY

If you need an external hard drive for extra storage, why buy one "ready made" when you can easily make it yourself for much cheaper? Or why throw away that 40GB notebook hard drive that you just replaced with a faster 100GB 7200RPM drive?

Recently I was in need of a bigger external drive. I had seen a Seagate came out with their own branded "Portable External Hard Drive" and thought, why not try to match the performance and capacity of the Seagate "ready made" drive with a DIY style and see if it's worth it.

The Benchmark

The Seagate 120GB external portable hard drive reviewed here not long ago is a fine external hard drive. It sports a 2.5" 5400 RPM hard drive inside, has a stylish aluminum case with a blue LED light and 1-year warranty. It can be bought for as low as $219 according to our review, but if you look hard you might find it for even cheaper. Either way I will not focus on price only since there are other benefits to building your own drive, nor is this a case study against big name external HD makers such as Seagate.

What you'll need

  1. A 2.5" hard drive of your choosing (naked, no enclosure)
  2. An enclosure to put the hard drive in and that will connect to your laptop via USB/FireWire and interface with the hard drive.

The hard drive I chose was Samsung SpinPoint 120GB 5400 RPM Bulk to match the Seagate drives size and speed, I bought it at Ewiz.com because they offered the lowest price of $139 (they were kind, helpful and agreed to take my order unlike NewEgg.com who have strict policies), at the time of writing these lines I see Ewiz.com lowered the price of the Samsung drive even more to $127.

For the enclosure I went with a Coolmax HD-211 2.5" USB 2 Aluminum enclosure because I liked how it looked and it is one of the cheapest out there at only $10 (also purchased at Ewiz.com). If you think I'm superficial and cheap, well you are right, but this choice has some logic to it as well -- more about that later.


the enclosure (left) and hard drive (right) ingredients, just mix togther ... DON'T add water! (view large image)

Packing and contents

The Samsung SpinPoint HD came in a static shield bag without much else, the Coolmax enclosure came shrink wrapped with a carrying pouch, 4 mounting screws, 6 case screws, a "Y" type USB cable, a jewelry screw driver and a mini-CD with driver software in case you need that.
.


(view large image)


Coolmax was thoughtful enough to include everything you need with the enclosure you purchase (view large image)

The DIY Part

Calling this a DIY project is somewhat stretching the term, it is as simple as can be. Like adding milk to your cereal (only here you close the milk afterwards and plug it into your notebook)

Step 1: Using the jewelry screwdriver, unscrew the 2 enclosure screws in the back panel of the enclosure and remove the back panel.

Step 2: Slide out the PCB (Printed Circuit Board), on which your hard drive will be mounted.

Step 3: Attach the Hard Drive to the 44-pin connector of the PCB.


the HD attached to the connector (view large image)

Step 4: Fix the Hard Drive in place with the 4 mounting screws on the underside.


the mounting screws in place (view large image)

Step 5: Slide the Hard Drive that is now attached to the PCB back into the enclosure and fix the back panel back in place and put the two screws back in tightly.

That's all there is to it! Any enclosure will provide instructions and may of course differ a bit, but will never be much more complicated than this -- and possibly even easier.

Assuming you have Windows XP you don't need to install any of the drivers that were included on the mini CD. If you want to initialize and partition the a new hard drive, use Windows XP built-in Disk Management. There are a few ways to get to that, the quickest is by typing clicking Start > Run and type in "diskmgmt.msc". The Windows Disk Management snap-in will open.


the Coolmax with its red and green leds (view large image)

I have two important tips to add to these steps above:

  1. First make sure you have a clean tidy surface to work on, those screws are awfully small and will go missing in the blink of an eye. The good news is the provided screw driver is magnetic and Coolmax saw fit to include 2 extra screws just in case you lose a couple.
  2. Second, before you start, discharge any static electricity in your body by touching something made of metal and handle the Hard Drive only from the sides. Avoid touching the bottom exposed circuit of a Hard Drive or the exposed circuits of the enclosure.

Price

The total cost of the parts for this DIY external hard drive was $137 as compared to $219 for the Seagate external drive that was reviewed. Currently Newegg.com lists the 100GB version of the Seagate portable external hard drive for $168, so this 120GB DIY solution is still cheaper than even that.

Power & Performance

Even though this is a 120GB drive it will run just fine on a single USB cable power source, however if more power is needed just plug in the RED plug as well. Other enclosures tested with this drive proved a single cable was just fine in those cases too.

Transfer speeds to the hard drive were very good, averaging 18.8 MB/sec with 18.1 ms seek time, not as fast as the Momentus inside the Seagate but good enough for an external USB enclosure. Real life test of copying a typical 700MB file from the notebook to the hard drive took about 30 seconds.

Heat & Noise

The enclosure never got warmer then the equivalent of the normal human body temperature, so it never felt hot. It was also very, very quiet without any clicking (like many Hitachi drives do) or chippering (like many Toshiba drives do), just a very low humming sound.

Warranty

All new 2.5" drives come with at least a 3-year manufacturer's warranty, while the Ewiz.com product page doesn't specify this, the NewEgg.com page has it in writing. So if something happens to the hard drive inside your "DIY drive" you will be covered. And if the enclosure breaks? Well, you just throw it away and buy another one for $10!

The Right HD For You

When I bought the Samsung Spin Point 120GB HD I was afraid that not all enclosures would support it chipset or power consumption wise. I'm quite happy to say I was wrong, even enclosures that specify they only support up to 80GB worked just fine with this drive.

I think any new generation 2.5" large capacity drive (> 100GB) would work flawlessly in almost any enclosure since the specifications are similar across all drives. For evidence I can testify I used Hitachi 7K60 7200 RPM 60GB HD in the same enclosure without any problem . The only reason I chose the Samsung brand really was because it was the cheapest and looked to be very quiet if not the quietest.

Choose Your Enclosure Carefully

The Coolmax was not the only enclosure I tested. The enclosure itself is almost as important as the HD inside. It's interesting to note that many enclosure are just "branded" versions of a generic enclosure made by an ODM (Original Design Manufacturer). It's quite possible two enclosures you see from different brands were actually made by the same original manufacturer and just re-badged with a brand name. If two enclosured from different brands look exactly the same, chances are that it is the same but by a different name.


(left to right) Coolmax, Hotdrive, Sweex are just brand name versions of ODM enclosures (view large image)

I'd go with an enclosure that has mounting screws that secure the Hard Drive tightly like the Coolmax does, it seems more solid than the suspended by pins only approach of the Bytecc Hotdrive 2.5" enclosure I tested (cost of $17). Some users might find the lack of mounting screws a plus if they intend to swap the Hard Drive inside the enclosure quite often, in that case the highly respected Thermaltake Silver Muse is good because it opens up like a box with a hinge and has foam padding to hold the HD in place.


The Coolmax (left) holds the HD secure with 4 mounting screws while the Hotdrive uses pins (view large image)

On the down side for the Coolmax enclosure, the enclosure thickness is only half of the Bytecc Hotdrive one. Not that the Coolmax is flimsy or anything, but I would prefer the thicker enclosure for more protection.


The Hotdrive (below) case is thicker than the CoolMax (on top) (view large image)

The carrying case you get with the enclosure is also an important factor to consider, they range from thin pouch that is designed to prevent scratches only to thick book cover like protection. If you think you'll need a carrying case for your hard drive I recommend choosing an enclosure that comes with a case and one that fits your needs .


Same enclosures as viewed above but inside their provided carrying cases (Coolmax, Hotdrive, Sweex) (view large image)

I also think the looks factor is somewhat important because all enclosures seem to work pretty much the same. I often choose an enclosure at least partly based on style & accessories included, the Sweex enclosure is an example of that, I bought it because it offered a screws implementation for mounting the HD and it had a brushed aluminum case which is very stylish and nice to touch.

Conclusion

The "DIY" option for creating a portable external storage solution is the way to go when in need of an external HD. Also, the next time Toshiba or Dell tries to overcharge you $300 for a HD upgrade when configuring your laptop, just get the cheapest 40GB hard drive they offer. Then use the money you save to buy the hard drive you actually want from a cheaper source (say a 100GB 7200RPM drive from NewEgg.com), then when you get the laptop swap out the 2.5" 40GB you configured with a fast hard drive you really wanted insde the laptop, then take put the 40GB crappy driveyou were forced to configure in the laptop into a $10 - $30 drive enclosure of your choice. And of course feel free to send me any money you save by taking this DIY route!

Pros (For building Your Own External Hard Drive)

  • More gigabytes of storage for your dollar
  • Better warranty on the hard drive when you buy it without an enclosure, usually at least 3-years
  • You can choose the style of the enclosure you want

Cons (For Building Your Own External Hard Drive)

  • Must have opposable thumb and be willing to turn a screwdriver

Some places to shop for Hard Drives and Enclosures are:

Thursday, June 01, 2006

7. Microsoft Windows Vista Editions and Costs

Here is an updated list. Windows Vista will come in 5 different versions; not 7 as was announced before. Edited 12/2/06: added price for full packaged product as well as price for upgrading and also new Windows Vista: Starter


Each version of Windows Vista is designed and focused upon the needs of a specific type of person. The different versions of Vista were aligned with specific types of PC hardware instead of with the different ways that people use their PCs. An example of this is Windows XP Professional Tablet PC Edition is designed for mobile PCs and supports handwriting recognition. Windows XP Media Center Edition serves as a hub for your home entertainment system. And Windows XP Professional x64 Edition enables the use of cutting-edge 64-bit processors. But what if you're looking for a single operating system that can connect to your TV, run on a mobile PC that supports handwriting recognition, serve as the hub of your home entertainment system, and take advantage of 64-bit performance and security? With Windows XP there is no offering that gives you this much flexibility.

The five different editions of Windows Vista are designed to fit the way you intend to use your PC:


Windows Vista Business
Regardless of the size of your organization, Windows Vista Business will help you lower your PC management costs, improve your security, enhance your productivity, and help you stay better connected.

The Windows Vista Business operating system is designed to meet the needs of business organizations of all sizes. For small businesses, Windows Vista Business will help keep PCs running smoothly and more securely so you will be less reliant on dedicated IT support. For larger organizations, Windows Vista Business provides dramatic new infrastructure improvements, enabling your IT staff to spend less time focused on the day-to-day maintenance of PCs and more time adding strategic value to your organization. Windows Vista Business also offers powerful new ways to organize, find, and share information while staying better connected whether you are in the office or on the road. This helps your business to run more efficiently than ever before.

More manageable, reliable, and secure

For small businesses, Windows Vista Business includes new technology and tools to ensure your PCs are always up-to-date, more secure, and running smoothly. For instance, Windows Vista Business will make your PCs safer with built-in protection against malicious software, or malware. You will be warned of impending hardware failures long before you risk losing any important business data. An array of sophisticated new backup technologies helps protect your information even in the event of a catastrophic hardware failure.

For larger organizations, Windows Vista Business has been designed from the ground up to improve the deployment and management of the operating system. For instance, image-based installation is now the default method for installing the Windows Vista operating system, and the images are no longer hardware-dependent. These two key design principles enable your organization to dramatically reduce the number of images you are required to manage and streamline the process of deploying new PCs and updating existing PCs.

For businesses of any size, Windows Vista Business is designed to allow your IT department to configure users' systems so that they can log onto their PCs as standard users instead of as administrators. Windows Vista Business enables the use of standard user accounts without the compatibility and usability issues that could occur in previous versions of Windows. This new capability significantly reduces the likelihood of a malicious attack causing damage to your organization's PCs.

Easier, faster access to information

Windows Vista Business has a new user interface, named Windows Aero™, which is designed to deliver new levels of efficiency for any business user. This new interface makes it easy to navigate through the operating system and from application to application. For instance, Windows Aero helps you juggle multiple tasks at once by providing a three-dimensional, real-time, animated view of all your open applications and documents.

In addition to these navigation improvements, Windows Vista Business makes it easier than ever to manage huge volumes of business documents. By integrating search throughout the operating system and providing new ways to organize files, Windows Vista Business helps you quickly find exactly what you are looking for.

For those who are not full-time IT professionals but have roles that require them to support their organizations' PCs, Windows Vista Business includes Small Business Resources. This built-in how-to guide leads you through everyday tasks and troubleshooting in easy-to-follow, non-technical language.

More mobile and better connected

Windows Vista Business is designed to help you easily and quickly connect with your organization, your customers, and your partners, whether you are in the office or on the road. Windows Vista Business includes all of the essential infrastructure required to more securely connect you to your business information whether you are sitting at your desk, working at home, connected to a WiFi hotspot, or even if you are using your cell phone to connect to the Internet.

To help you be more productive when you are away from your desk, Windows Vista Business includes Tablet PC technology that lets you interact with your Tablet PC-compatible computer using a digital pen or your fingertip instead of a keyboard. The new Tablet PC features in Windows Vista Business include improved handwriting recognition and simpler ways to navigate through documents and applications without a keyboard.

Computers that include Windows Vista Business and an auxiliary Windows SideShow™ display will also allow you to access critical business information even when your computer is turned off. Windows Vista Business also makes it easy for you to share documents and collaborate with colleagues, partners, and customers—even if a network is not available. Additionally, Windows Vista Business helps you get the most out of your portable PC by making it quick and easy to manage key mobility settings.

Regardless of whether your organization is big or small, Windows Vista Business will help you lower your PC management costs, improve your security, enhance your productivity, and stay better connected than ever before.

Suggested retail price for full package product, $299.00 USD. Suggested upgrade retail price, $199.00 USD.


Windows Vista Enterprise
Windows Vista Enterprise is designed to meet the needs of large global organizations with highly complex IT infrastructures. Windows Vista Enterprise can help you lower your IT costs while providing additional layers of protection for your sensitive data.

To better address the needs of large, global organizations and those with highly complex IT infrastructures, Microsoft will introduce a new version of Windows—Windows Vista Enterprise—designed to significantly lower IT costs and risk. In addition to all of the features available in Windows Vista Business, Windows Vista Enterprise is designed to provide higher levels of data protection using hardware-based encryption technology. It also includes tools to improve application compatibility and enables organizations to standardize by using a single worldwide deployment image. Windows Vista Enterprise will only be available to customers who have PCs covered by Microsoft Software Assurance or a Microsoft Enterprise Agreement.

Data protection

Windows Vista Enterprise includes Windows BitLocker™ Drive Encryption, a new technology which helps prevent sensitive data and intellectual property from falling into the wrong hands if a computer is lost or stolen. Windows BitLocker uses hardware-based data encryption technology that gives you greater peace of mind knowing that your corporate intellectual property is safer and will remain your strategic asset. Also, since the entire hard drive is encrypted, Windows BitLocker reduces the cost associated with decommissioning old PCs.

Application compatibility

Windows Vista Enterprise includes built-in tools to improve application compatibility with previous versions of Microsoft operating systems, as well as with UNIX operating systems. A feature of Windows Vista Enterprise, Virtual PC Express enables you to run—unchanged—a legacy application on a legacy Windows operating system in a virtual environment on top of Windows Vista Enterprise. This feature saves you time and money if you are unable to easily migrate a legacy application directly to Windows Vista.

Additionally, Windows Vista Enterprise includes Subsystem for UNIX-based Applications (SUA), which enables you to run UNIX applications unchanged on a Windows Vista Enterprise-based PC. Whereas today a UNIX database administrator or system administrator needs to have a UNIX workstation in addition to a Windows-based PC, Windows Vista Enterprise enables you to consolidate both functions into a single Windows Vista-based PC.

Multi-language support

An interface language controls which language a user sees in the Windows Start menu, in the help system, in built-in management tools, and in Windows dialog boxes. Windows Vista Enterprise includes all available interface languages in one offering. Access to all worldwide Windows interface languages enables organizations to build a single deployment image that can be used worldwide and to deploy individual PCs that simultaneously offer different interface languages for different users.

Windows Vista Enterprise is designed to meet the needs of large global organizations and those with highly complex IT infrastructures. If your organization has these requirements, Windows Vista Enterprise will help you lower your IT costs and will provide additional layers of protection for your sensitive data.

The Windows Vista Enterprise edition is only available to Microsoft Volume License customers, it is not available for retail purchase.


Windows Vista Home Premium
Whether you choose to use your PC to write e-mail and surf the Internet, for home entertainment, or to track your household expenses, Windows Vista Home Premium delivers a more complete and satisfying computing experience.

Windows Vista Home Premium is the operating system for homes with advanced computer needs. It will help you use your laptop or desktop PC more effectively as well as enable you to enjoy new, exciting digital entertainment experiences—all with the benefit of added security and reliability.

New user interface

Windows Vista Home Premium has a new user interface named Windows Aero™, which is both efficient and beautiful. This new interface makes it easier than ever before to find your way around the operating system. It even makes it easier to accomplish multiple tasks at once by providing a three-dimensional, real-time, animated view of all of your open applications and documents. Additionally, Windows Vista Home Premium helps you quickly find and organize large collections of documents, pictures, movies, videos, and music. By integrating search throughout the operating system, Windows Vista Home Premium helps you quickly find exactly what you are looking for.

Improved mobility

Windows Vista Home Premium makes it easy to take your home computing experience with you wherever you go. For example, Windows Vista Home Premium includes Tablet PC technology that enables you to interact with your Tablet PC-compatible computer with a digital pen or with your fingertip instead of having to use a keyboard. Computers that include Windows Vista Home Premium and an auxiliary Windows SideShow™ display will also allow you to access key data even when your computer is off. It is also easier than ever to share files between other PCs in your household and to manage your laptop computer settings to more securely connect to your favorite WiFi hotspot.

More entertaining

Windows Vista Home Premium will improve every aspect of your digital entertainment experiences including viewing and sharing photos, video, TV, movies, music, games, and more. For example, Windows Vista Home Premium enables you to create your own DVDs and edit your own high-definition movies. Most significantly, Windows Vista Home Premium includes all of the Windows Media Center capabilities for turning your PC into an all-in-one home entertainment center. Windows Media Center in Windows Vista provides new ways for you to enjoy your music, photos, and DVD movies. You can also use Windows Media Center to record and watch your favorite TV shows (even HDTV) and to access new kinds of online entertainment content. You will also be able to connect Windows Vista Home Premium to your Microsoft Xbox 360 to extend your Media Center experience to multiple rooms in your home.

Whatever you choose to do with your home PC, Windows Vista Home Premium will deliver a more complete and satisfying computing experience.

Suggested retail price for full package product, $239.00 USD. Suggested upgrade retail price, $159.00 USD.


Windows Vista Home Basic
Windows Vista Home Basic is designed to deliver improved reliability, security, and usability to home PC users who just want to do the basics with their PCs.

Windows Vista Home Basic is the operating system for homes with basic computing needs. It is easy to set up, it helps you use your PC more securely and reliably, and like all of the editions of Windows Vista, it is compatible with the widest range of software, devices, and services that you use and trust. If you simply want to use your PC for tasks such as surfing the Internet, corresponding with friends and family using e-mail, or performing basic document creation and editing tasks, then Windows Vista Home Basic will deliver a safer, more reliable, and more productive computing environment.

Safer and more reliable

Windows Vista is designed to be the safest operating system that Microsoft has ever delivered. Every edition of Windows Vista, including Windows Vista Home Basic, provides the essential tools and technologies to help protect you whether you are browsing the Internet, connecting to a wireless network, or just reading e-mail. All editions of Windows Vista include new tools that can warn you of impending hardware failures long before you have lost any important personal data. Additionally, all Windows Vista editions will include new parental control features that will allow you to manage and monitor your family's use of games, the Internet, instant messaging, and other activities on your PC that might concern you as a parent. Windows Vista Home Basic is designed so that you and your family can focus on what's most important to you and spend less time worrying about your safety.

Easier to set up and use

As with all of other editions of Windows Vista, Windows Vista Home Basic makes your PC significantly easier to use. Windows Vista Home Basic has new tools to help you painlessly move your personal files and settings from your old PC to your new Windows Vista-based PC. Additionally, Windows Vista Home Basic integrates new search tools throughout the operating system to help you quickly find the precise file or program you need.

Windows Vista Home Basic contains all of the basic features to make your computing experience easier, safer, and more reliable. Even if your existing PC seems to be adequate for basic tasks such as reading e-mail and browsing the web, by upgrading your PC to Windows Vista Home Basic or by purchasing a new PC installed with Windows Vista Home Basic, you will benefit from a better computing experience and more peace of mind.

Windows Vista Home Basic is the edition of Windows for users with the most basic computing needs. The features in Windows Vista Home Basic also form the foundation of all of the other editions of Windows Vista, including Windows Vista Home Premium and Windows Vista Ultimate.

Suggested retail price for full package product, $199.00 USD. Suggested upgrade retail price, $99.95 USD.


Windows Vista Ultimate
If you want all of the best business features, all of the best mobility features, and all of the best home entertainment features that Windows Vista has to offer, Windows Vista Ultimate is the solution for you. With Windows Vista Ultimate you don't have to compromise.

Windows Vista Ultimate is the most comprehensive edition of Windows Vista. It is the first operating system that combines all of the advanced infrastructure features of a business-focused operating system, all of the management and efficiency features of a mobility-focused operating system, and all of the digital entertainment features of a consumer-focused operating system. For the person who wants one operating system that is great for working from home, working on the road, and for entertainment, Windows Vista Ultimate is the operating system that lets you have it all.

Work from home

Windows Vista Ultimate includes all of the features that make it easy to remotely connect to business networks. So when you're working from home, you'll have advanced networking capabilities, such as the ability to join a domain, support for Group Policy, and features such as Remote Desktop. Windows Vista Ultimate also includes Windows BitLocker™ Drive Encryption that provides new levels of protection against theft for your important business data whether you are at home, on the road, or in the office.

The latest in entertainment

Windows Vista Ultimate delivers all of the entertainment features available in Windows Vista Home Premium. It includes everything you need to enjoy the latest in digital photography, music, movies, analog TV, or even HDTV. Windows Vista Ultimate has great tools such as Windows Photo Gallery and Windows Movie Maker to ensure that you have everything you need to collect, manage, and edit your digital content. It also includes Windows Media Center for turning your PC into an all-in-one home entertainment center.

No compromises

Windows Vista Ultimate delivers all of the features available to both business users and home users. It is the ideal solution for a small-business owner who wants a single PC that he or she can use at the office, on the road, and at home. It is also the ideal solution for someone who wants a home PC that will be used primarily for entertainment purposes but that can also be used for business purposes such as connecting to a corporate network.

If you want all of the best business features, all of the best mobility features, and all of the best home entertainment features, Windows Vista Ultimate is the solution for you. With Windows Vista Ultimate, you don't have to compromise.

Suggested retail price for full package product, $399.00 USD. Suggested upgrade retail price, $259.00 USD.


Windows Vista Starter
Available in 119 emerging markets, Windows Vista Starter provides individuals and families with the basic benefits of Windows Vista at an affordable price. Designed for first-time PC users, Windows Vista Starter is easy to learn and includes help features tailored to beginner users.

Basic computing at an affordable price

Maintaining the goal of making technology accessible to customers in emerging markets, Windows Vista Starter offers a basic set of features targeted to beginner users at a price that fits their budget. Windows Vista Starter will be available* at an affordable price from OEM and system builder partners, and through government-sponsored programs.

Intuitive and easy to use

Windows Vista Starter includes more help features for first-time PC users. With localized and customized support, step-by-step guidance, and interactive video demonstrations to help perform the most popular tasks, Windows Vista Starter makes it easy to use a PC—in any language.

Reliable and secure

Windows Vista Starter includes even more security and reliability than previous versions. And like all editions of Windows Vista, Windows Vista Starter is compatible with the widest range of software, devices, and services.

*Note: Windows Vista Starter is not currently scheduled to be available in the United States, Canada, the European Union, Australia, New Zealand, or other high income markets as defined by the World Bank.

8. Windows Vista Capable and Premium Ready PCs

This information is taken from Microsoft's Windows Vista Information that was released on their Vista website. Here

Choose a Windows Vista Capable or Premium Ready PC for the Windows Vista edition that's right for you.

Are you looking to buy a Windows XP-based computer today but want to make sure that it can run Windows Vista? There's no need to wait. When you buy a new PC that carries the Windows Vista Capable or Premium Ready PC designation, you’ll be able to upgrade to one of the editions of Windows Vista while taking advantage of all the opportunities offered by Windows XP today.

What is a Windows Vista Capable PC?

A new PC that carries the Windows Vista Capable PC logo can run Windows Vista. All editions of Windows Vista will deliver core experiences such as innovations in organizing and finding information, security, and reliability. All Windows Vista Capable PCs will run these core experiences at a minimum. Some features available in the premium editions of Windows Vista—like the new Windows Aero user experience—may require advanced or additional hardware.

A Windows Vista Capable PC includes at least:

  • A modern processor (at least 800MHz1).
  • 512 MB of system memory.
  • A graphics processor that is DirectX 9 capable.

Windows Vista Premium Ready PCs
To get an even better Windows Vista experience, including the Windows Aero user experience, ask for a Windows Vista Capable PC that is designated Premium Ready, or choose a PC that meets or exceeds the Premium Ready requirements described below. Features available in specific premium editions of Windows Vista, such as the ability to watch and record live TV, may require additional hardware.

A Windows Vista Premium Ready PC includes at least:

  • 1 GHz 32-bit (x86) or 64-bit (x64) processor1.
  • 1 GB of system memory.
  • A graphics processor that runs Windows Aero2.
  • 128 MB of graphics memory.
  • 40 GB of hard drive capacity with 15 GB free space.
  • DVD-ROM Drive3.
  • Audio output capability.
  • Internet access capability.

Read all of the Windows Vista Capable footnotes.

Review the Windows Vista minimum supported system requirements.

Windows Marketplace has a selection of Windows Vista Capable and Premium Ready PCs that are available today.

Windows Vista enterprise hardware planning guidance is available on TechNet.

Can the Windows Vista experience vary on different PCs?

Yes. Windows Vista is the first Windows operating system with a user experience that adapts to take advantage of the capabilities of the hardware on which it is installed.

All Windows Vista Capable PCs will be able to run at least the core experiences of Windows Vista.

All Windows Vista Premium Ready PCs can deliver even better Windows Vista experiences, including the new Windows Aero user experience.

Does buying a Windows Vista Capable PC mean that I will receive a free upgrade to Windows Vista?

No. A PC that is Windows Vista Capable or Premium Ready means that the PC is ready for an upgrade from Windows XP. You would still need to purchase the edition of Windows Vista that you want to install on your Windows Vista Capable or Premium Ready PC.

Monday, May 08, 2006

13. Wireless Router Guide

From NotebookReview
By: NickS


This guide is to help you find which wireless router you should get, if you need/want one.

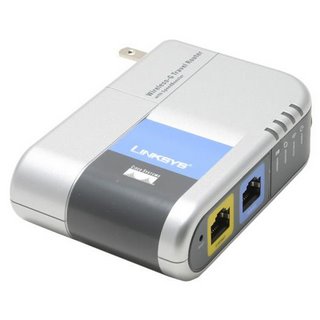
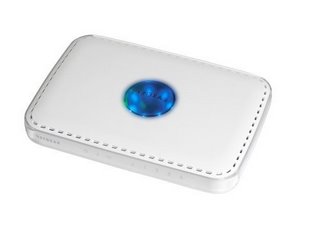
**CLICK ON A ROUTER TO GET A LARGER AND BETTER VIEW OF THAT ROUTER**

Linksys

Brief Overview:

Linksys routers are very nice. You rarely have disconnections with these routers. The one con about linksys is that there setup is not very user friendly, but i have seen it improving so if you think you can handle the setup. There support is very nice and they really do help. There is also an option where you can go online and talk to them. Overall, Linksys is a nice company and there routers are built nicely with no over heating.

Linksys Routers:

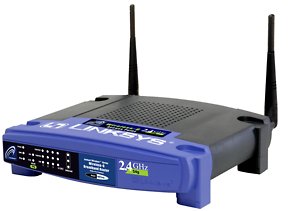
Linksys WRT54G Linksys.com Info / Newegg Deal / Amazon Deal
Linksys WRT54GS Linksys.com Info / Newegg Deal / Amazon Deal
Linksys WRT54GC Linksys.com Info / Newegg Deal / Amazon Deal
Linksys WRT54GL Linksys.com Info / Newegg Deal / Amazon Deal
Linksys WRT54GX Linksys.com Info / Newegg Deal / Amazon Deal
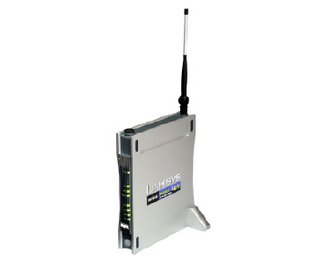
Linksys WRV54G Linksys.com Info / Newegg Deal / Amazon Deal
Linksys WRT55AG Linksys.com Info / Newegg Deal / Amazon Deal


Linksys WRT54G


This router is a basic networking router. If all you want to do is just network between 4 PC's wired and have wireless, its your best bet. This routers features are:

  • All-in-one Internet-sharing Router, 4-port Switch, and Wireless-G (802.11g) Access Point
  • Shares a single Internet connection and other resources with Ethernet wired and Wireless-G clients
  • Wireless data rates up to 54Mbps -- 5 times as fast as Wireless-B (802.11b), but also interoperable with Wireless-B devices (at 11Mbps)
  • Advanced security: Wi-Fi Protected Access (WPA), wireless MAC address filtering, powerful SPI firewall
Its a nice basic router and if your in a budget, this router is pretty cheap and almost always has a MIR.

Linksys WRT54GS


This router is almost the same as the previous one except that this router has Speedbooster which means boosts downloading speeds. (Note: This can only be shown if you have a Linksys Wireless Card too) So if you already have a wireless card and dont want to replace it, your better off getting a sister model of it. (WRT54G* (*C or L)). Here are the features of this router:
  • All-in-one Internet-sharing Router, 4-port Switch, and up to 35% performance enhanced Wireless-G Access Point
  • Shares a single Internet connection and other resources with Ethernet wired, Wireless-G, -B, and SpeedBooster devices
  • Push button setup feature makes wireless configuration secure and simple
  • High security: Wi-Fi Protected AccessTM 2(WPA2), 802.1x, powerful SPI firewall


Linksys WRT54GC


This router is identical to the WRT54G version except this time, this router is very small and compact. If you have limited space, this router might be good for you. Or if you need to actually take this router to different locations, its easier because of its size. Here are the features of this router:
  • All-in-one Internet-sharing Router, 4-port Switch, and Wireless-G (802.11g) Access Point
  • Shares a single Internet connection and other resources with Ethernet wired and Wireless-G and B devices
  • Compact form factor fits in anywhere
  • High security: Wi-Fi Protected Access (WPA/WPA2 Personal), wireless MAC address filtering, powerful SPI firewall


Linksys WRT54GL


This router is the newest of this line up. It has a little better security, the easy setup button making it easy to customize this router. So if you need a little extra security, this router might be a good decision. Here are the features of this router:
  • All-in-one Internet-sharing Router, 4-port Switch, and 54Mbps Wireless-G (802.11g) Access Point
  • Shares a single Internet connection and other resources with Ethernet wired and Wireless-G and -B devices
  • Push button setup feature makes wireless configuration secure and simple
  • High security: TKIP and AES encryption, wireless MAC address filtering, powerful SPI firewall


Linksys WRT54GX


This router is quite different from the previous version as this router has SRX meaning its faster then standard G and has a better signal. If your one of those people were you want very fast speeds and a very big area of signal, this would be a good suggestion. (Note: Linksys also offers a WRT54GX2 and WRT54GX4 which have greater speeds but are basically the same but just faster) Here are the features of this router:
  • Internet-sharing Router, 4-port Switch, with a built in speed and range enhanced Wireless-G (802.11g) Access Point
  • Shares a single Internet connection and other resources with Ethernet wired, Wireless-G, -B, and other SRX devices
  • New SRX technology: the farther away, the more advantage -- up to 8 times faster than standard Wireless-G (802.11g)
  • SRX also increases wireless range by up to 3 times and reduces dead spots in coverage area


Linksys WTR54GS


This is Linksys's smallest router which it can even fit into your pocket. It also has speedbooster on it which boosts performance. If you need a very small, compact, traveling router, you might want to take a look at it. Here are the features of this router:
  • Shares a wired or wireless Internet connection with SpeedBooster, Wireless-G and -B devices, and an Ethernet wired PC
  • Create temporary, personal, wireless access in your hotel room or a coffee shop hotspot -- pushbutton easy
  • Travel-friendly design with built-in power supply and antenna
  • High security: Wi-Fi Protected Access (WPA), wireless MAC address filtering, powerful SPI firewall


Linksys WRV54G - (Small Business Router)


This router has great security protection including its VPN router. This router is more for a small business then home use because you can have 50 users connect to this router. It also has authoriztion options. Here are the features for this router:
  • An Internet connection-sharing Router, Switch, and Access Point with built-in VPN endpoint capability and advanced security features
  • Jump start your small business network by connecting both Wireless-G (802.11g) PCs, and local wired PCs
  • Securely connect up to 50 remote or traveling users to your office network via VPN
  • "Hotspot Ready" with subscriber registration, authorization and authentication functions


Linksys WRT55AG*


  • Dual-band, tri-standard Access Point communicates with Wireless-A (802.11a), Wireless-B (802.11b), and Wireless-G (802.11g) wireless networks
  • Protect your wireless investment while preparing your infrastructure for the future
  • Built-in 4-port Switch jump-starts your wired network, while the Router functionality securely shares your high-speed Internet connection with wired and wireless computers
  • Advanced Security: WEP and WPA wireless data encryption, VPN pass-through, Internet access control and Wireless filters

Netgear

Netgear has very nice, stylish routers. There support is decent and there instructions can be vague but there easy and to the point. The netgear setup and configuration is very easy. But, there routers can run pretty hot and there have been known frequent disconnects with some of there routers. But that can be fixed by updating the firmware, and to make them run cool, simply put the router in a position where more air can go through it like on some a stand comes with it.

Netgear Routers:

Netgear WPN824 Netgear.com Info / Newegg Deal / Amazon Deal
Netgear WPNT834 Netgear.com Info / Newegg Deal / Amazon Deal
Netgear WGT624 Netgear.com Info / Newegg Deal / Amazon Deal
Netgear WGR614 Netgear.com Info / Newegg Deal / Amazon Deal
Netgear WGR101 Netgear.com info / Newegg Deal / Amazon Deal
Netgear DG834PN* Netgear.com Info
Netgear WGU624* Netgear.com Info
Netgear WGT634U* Netgear.com Info
Netgear WGT624SC* Netgear.com Info
Netgear DG834G* Netgear.com Info

Netgear WGR826V* Netgear.com Info
Netgear MR814* Netgear.com Info


*No info currently in this article about these routers

Netgear WPN824


This router has a very good signal. Netgear claims this router is able to have 1000% more wireless coverage than G. So if you are in need of a router that you are sure of that will cover your house and maybe outside (Depending on the size of your house) of your house. Plus with MIMO, there is a small chance for wireless dead spots. Security on this router is also pretty nice. Here are the features for this router:
  • Up to 1000% more wireless coverage and speed than 802.11g
  • RangeMax Smart MIMO (Multi-In, Multi Out) Technology
  • 7 Internal Smart Antennas adapt on the fly to interference
  • 100% compatible with 802.11b, 802.11g, and SuperG devices
  • Ultra-Secure (double firewall, WEP, WPA-PSK) protect against unauthorized usage
Netgear WPNT834


This router is new from Netgear. With this router, you can have up to 240Mbps of speed. It has a good signal and is a fairly nice, new, good looking router. Here are the features of this router:
  • Enables simultaneous HD Video Streaming, downloading MP3s, Multi-player gaming, and file sharing.
  • Up to 240 Mbps speeds for wireless networks
  • RangeMax MIMO Technology delivers superior wireless coverage
  • Increases the performance of your existing 802.11b/g devices by up to 50%
  • Ultra Secure with Double Firewall, WEP Encryption, and WPA2 Security


Netgear WGT624


This router has 108Mbps speed with Super G. Its a decent, stylish router which is perfect for having multiple computers on your network. Here are some of the features for this router:
  • Super Fast! – 108 Mbps with Super G Technology (when used with NETGEAR WG111T, WG311T, or WG511T Adapters)
  • Super Easy! – Smart Wizard gets you up and running in minutes
  • Super Secure! – Over than 10 security & privacy features including Double Firewall (SPI & NAT), WEP Encryption, and WPA (Pre-Shared Key)
  • Super Range! –Delivers extended range up to 400ft
Netgear WGR614


Here is a basic Netgear G router. If you want just a simple home network, this router would be an option to consider. This router does get pretty hot. Also the instructions for setup that Netgear gives you are pretty vague but it does get the job done. This would be a good choice for just a basic network and is pretty affordable to. Here are the features of this router:
  • Speeds of 802.11g - up to 5x faster than 802.11b
  • Smart Wizard automatically detects ISP settings and walks you through installation
  • Double Firewall - SPI & NAT
  • Compatible with 802.11b devices and 802.11g devices
  • Wi-Fi Protected Access Pre-Shared Key (WPA-PSK)
Netgear WGR101


This router is perfect for traveling. It is very compact yet still a decent Wireless G router. If you think you might be traveling a lot and want to simple hook this up in a hotel room, this might be for you. Here are some of the features to this router:
  • Compact size and convenient carrying case
  • Switch to select between single and multi-user mode
  • Interoperable with both 802.11b and 802.11g devices
  • Speeds of up to 54 Mbps - up to 5x faster than 802.11b
  • Highest-level Wired Equivalent Privacy (WEP) encryption
Netgear DG834PN


Netgear WGU624


Netgear WGT634U


Netgear WGT624SC


Netgear DG834G


Netgear WGR826V


Netgear MR814


D-Link

D-Link is also a top wireless selling brand. They have decent routers and there support is pretty basic. There easier to set up also. Here are some of the main D-Link routers:

D-Link Routers:

DI-634M D-Link.com Info
DI-624 D-Link.com Info
DI-524 D-Link.com Info
DI-624M* D-Link.com Info
DI-724U* D-Link.com Info
DI-624S* D-Link.com Info
DI-824VUP* D-Link.com Info
DWL-G730AP* D-Link.com Info
DI-784* D-Link.com Info


*No info currently in this article about these routers

D-Link DI-634M


A router that has 108Mbps of speed with MIMO built in it. It is ideal for networking between more than 3 computers. Here are the top features of this router:
  • Based on MIMO technology, Double XR (Xccelerated Rates at Xtended Ranges) technology provides extended, whole-house coverage; data transfer speeds up to 108 Mbps
  • 2.4GHz wireless frequency (802.11b- and 802.11g-compliant)
  • Quad Smart Antenna Design features 2 vertical and 2 horizontal antennas to distribute radio signals in both vertical and linear planes and maximize wireless coverage area


D-Link DI-624


This router also has speeds capaable of 108Mbps (Xtreme G wireless router). Its combatible with B wireless devices. It has a good signal and offers good protection from intruders. Some main features of this router:
  • Xtreme G networking (108 Mbps) allows accelerated data transfer speeds without losing compatibility with 802.11b networks
  • Silicon chip technology improves performance and enhances speed
  • Advanced firewall with policy-based filters, including MAC address, IP address, URL and/or domain name, and available scheduling
  • 802.1x wireless user authentication and WPA (Wi-Fi Protected Access) high-level data security features; 64/128-bit WEP (Wired Equivalent Privacy) data encryption
D-Link DI-524


This is a basic D-Link G router with speeds of 54Mbps. Built in firewall for good protection also. Some other good features of this router:
  • 2.4GHz wireless frequency (802.11g compliant)
  • Up to 54 Mbps data transfer rates — almost 5 times that of standard 802.11b rates
  • Built-in 4-port switch with 10/100Base-T support to connect additional computers without wireless capability


Overall Conclusion (Update Soon)

Basic Routers (Basic need to just have a network)

Linksys WRT54G
Linksys WRT54GS
Linksys WRT54GC
Linksys WTR54GS
Netgear WGR614
Netgear WGR101
D-Link DI-524

Intermediate (Faster Speeds)

Linksys WRT54GL
Linksys WRT54GX
Netgear WGT624
D-Link DI-624

Advanced (Fast Speeds, MIMO, Better Signal Strength)

Linksys WRV54G
Netgear WPN824
Netgear WPNT834
D-Link DI-634M

When buying a router, you basically just need a basic router for the standard 2 computer network. If you want to
have a better than basic router, maybe think about the higher level routers as say that have Super G, MIMO, SRX, etc.

This list will be added later with additional companies. Thank you for your time. I hope this has helped.